User authentication is a common task almost every web developer has to deal with when developing modern web applications. Angular development is no exception.
There’s also a growing expectation from users that they can sign up/sign in to your app using their identity managed by an identity provider independent of your app. An example of this is the well-known “Sign in with Google” and “Continue with Facebook” buttons.
OpenID Connect (OIDC) allows the developers to avoid manually implementing user authentication and use an identity provider that would handle that complexity for them instead.
In this blog post, we will briefly review what OIDC is, what flows it has, and which OIDC flow you should use for Single Page Applications. After that, we’ll apply the theory in practice by implementing a simple login functionality in an Angular application using Google as an Identity Provider (IP). We will show how easy it is to add OIDC to Angular apps using one of the most popular OIDC client libraries.
Table of Contents
Introduction
OpenID Foundation developed OpenID Connect and ratified it as a standard for identity interactions in 2014. It is an interoperable REST-like authentication protocol based on OAuth 2.0.
Are OAuth and OIDC the same?
Let’s recall what OAuth (stands for Open Authorization) 2.0 is - it is an authorization framework for delegated access control. It defines multiple grant types - ways of obtaining access tokens from an authorization server. In particular, the authorization code grant type defines how a user – a resource owner – can authorize third-party clients to access a certain scope of their resources on a resource server on their behalf.
The third-party gets issued an access token, which is an arbitrary string that doesn’t necessarily contain any information about the user who was authenticated during the authorization process. The access token can be used to access the resource server on behalf of the end-user. The resource server, upon receiving the access token, will make a request to the issuer of the token to get the metadata about the end-user associated with that token. This process is invisible to the third-party client app.
One way to obtain the information about the end-user identity is to call a resource server’s API that returns that kind of information. For example, in the case of Facebook, the following request:
1 | GET https://graph.facebook.com/me?access_token=ACCESS-TOKEN |
with a valid access token would return the following JSON:
1 | { |
with the name and the Facebook ID of the end-user to whom the access token is bound by the issuer.
GitHub also provides an endpoint that returns the information about the user to whom the access token is mapped:
1 | GET https://api.github.com/user |
1 | { |
We have used OAuth 2.0 to get the information about the user from two different resource servers. We could see how the APIs were different, but they both provided us with the information that we could use to authenticate the end-user.
The question is now how the endpoint should be called? GET /user? GET /identity? GET /user-details? GET /user-info? What should the response look like?
Another problem is that we are using access tokens for authentication, although their purpose is authorization. There is also no standard way to log out the user or manage sessions.
This workaround - using authorization code grant type to authenticate a user is not needed when using OpenID Connect.
OpenID Connect isn’t about authorization, it’s about authentication. It is an identity layer built on top of OAuth 2.0. It standardizes user identity scopes and an additional response type id_token. The user identity verification is delegated to the authentication performed by an authorization server and returned to the client in a standardized, secure identity token.
A typical OIDC authentication request using implicit flow would look like this:
1 | GET https://server.example.com/authorize? |
A successful authentication response looks like this:
1 | HTTP/1.1 302 Found |
Since the response parameters are returned in the URI fragment value, the browser will parse the fragment encoded values and pass them to the Angular application for consumption. The responsibility of the Angular application will be to validate the ID token and remove the URL fragment part so that the tokens don’t appear in the browser history. Below are the four things that need to be done with the values returned in the fragment:
- validate that the
statevalue is an exact match to the value that was sent to the authorization server in the authentication request, - validate the signature of the ID Token,
- validate that the
noncevalue in the ID token is an exact match of the value that was sent to the authorization server in the authentication request, - validate that the
at_hashvalue in the ID token is an exact match of the Base64 URL encoded left half of the hash of theaccess_token.
Next, let’s review what’s inside the ID token.
OIDC ID token
The OIDC ID token is a JWT that contains information about an authenticated user. Note, that there is no need to make an API call to a resource server to get this information, unlike it was with the traditional OAuth 2.0.
The id_token returned from the authorization server consists of three parts separated by dots (.), which are:
- Header
- Payload
- Signature
Thus, the token looks like the following:
1 | xxxxx.yyyyy.zzzzz |
Header
The header typically consists of two claims: the type of the token, which is always “JWT”, and the signing algorithm, which is most commonly “RS256” today, but you may also see other values here.
For example:
1 | { |
This JSON is a Base64 URL encoded to form the first part of the ID token.
Note, that the ID tokens usually start with “eyJhbGciOi”, which is Base64 URL encoding of {"alg": - the first 7 characters of a typical ID token header.
Payload
The second part of the token is the payload that contains claims about the authenticated user.
Note, that while JWT doesn’t have any required claims, the ID token has 5 required claims:
iss- Issuer Identifier. This value is a case-sensitive URL using thehttpsscheme. Besides the scheme and the host components, it can also contain port and path components, but no query or fragment components.sub- Subject Identifier. This value is a case-sensitive, locally unique, and never reassigned ID of the authenticated user within the Issuer. This value is intended to be used by the clients. The maximum length is 255 ASCII characters.aud- Audience(s) that this ID Token is intended for. Most commonly it is a case-sensitive string that contains the OAuth 2.0client_idvalue. In the general case, theaudvalue is an array of case-sensitive strings and may contain identifiers for other audiences.exp- Expiration time of the token, represented as the UNIX epoch time (number of seconds from 1970-01-01T00:00:00Z in UTC). The current time must be strictly less than theexpvalue.iat- Time at which the token was issued, represented as the UNIX epoch time.
There are 5 other optional claims defined in the OIDC core specification. The most important one for SPAs is nonce that was already mentioned above. This parameter was added to the initial OAuth 2.0 authorization grant request in OIDC to mitigate replay attacks. This claim is required in the implicit flow.
Here is an example of an ID token payload:
1 | { |
This JSON is also a Base64 URL encoded to form the second part of the ID token.
Signature
The signature part of the ID token is generated by signing the concatenated string that consists of the header, the “.” symbol, and the payload:
1 | signature = RS256(`${header}.${payload}`, privateKey) |
The signature is then Base64 URL encoded to form the third part of the ID token.
Since the ID tokens are usually signed with a private key, the users of ID tokens can easily verify that the payload wasn’t changed and that the sender of the ID token is actually who it says it is.
Next, let’s do some practice. We’ll create a GCP project, and configure it for OIDC.

Create a GCP project and enable OAuth2
To proceed with this tutorial, you’ll need a Google Cloud Platform (GCP) account. If you don’t have one, you can create one for free - all you need is a Gmail account (which you can also register for free - no credit card required).
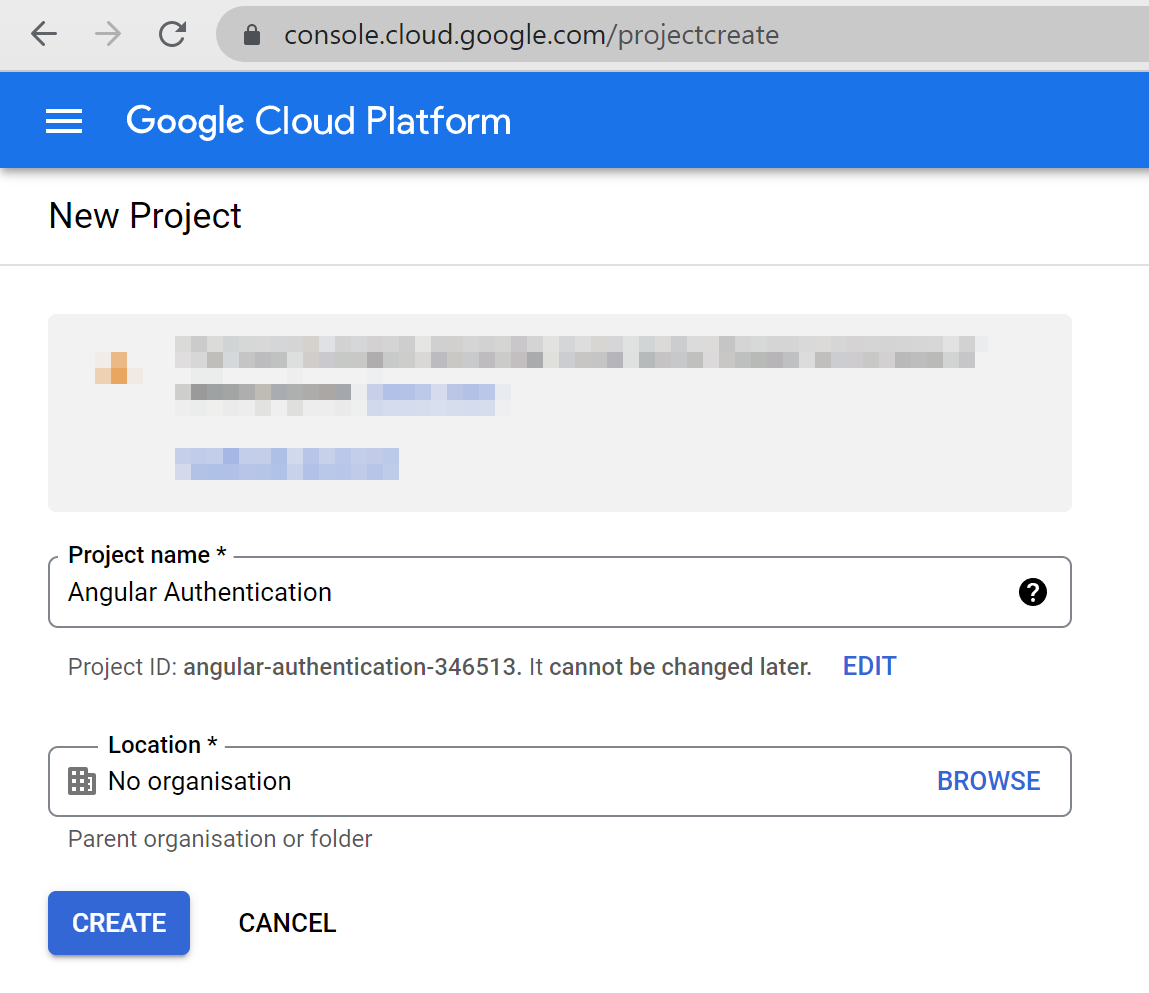
Go to the GCP New Project page and create a new GCP project.
Configure the OAuth2 consent screen
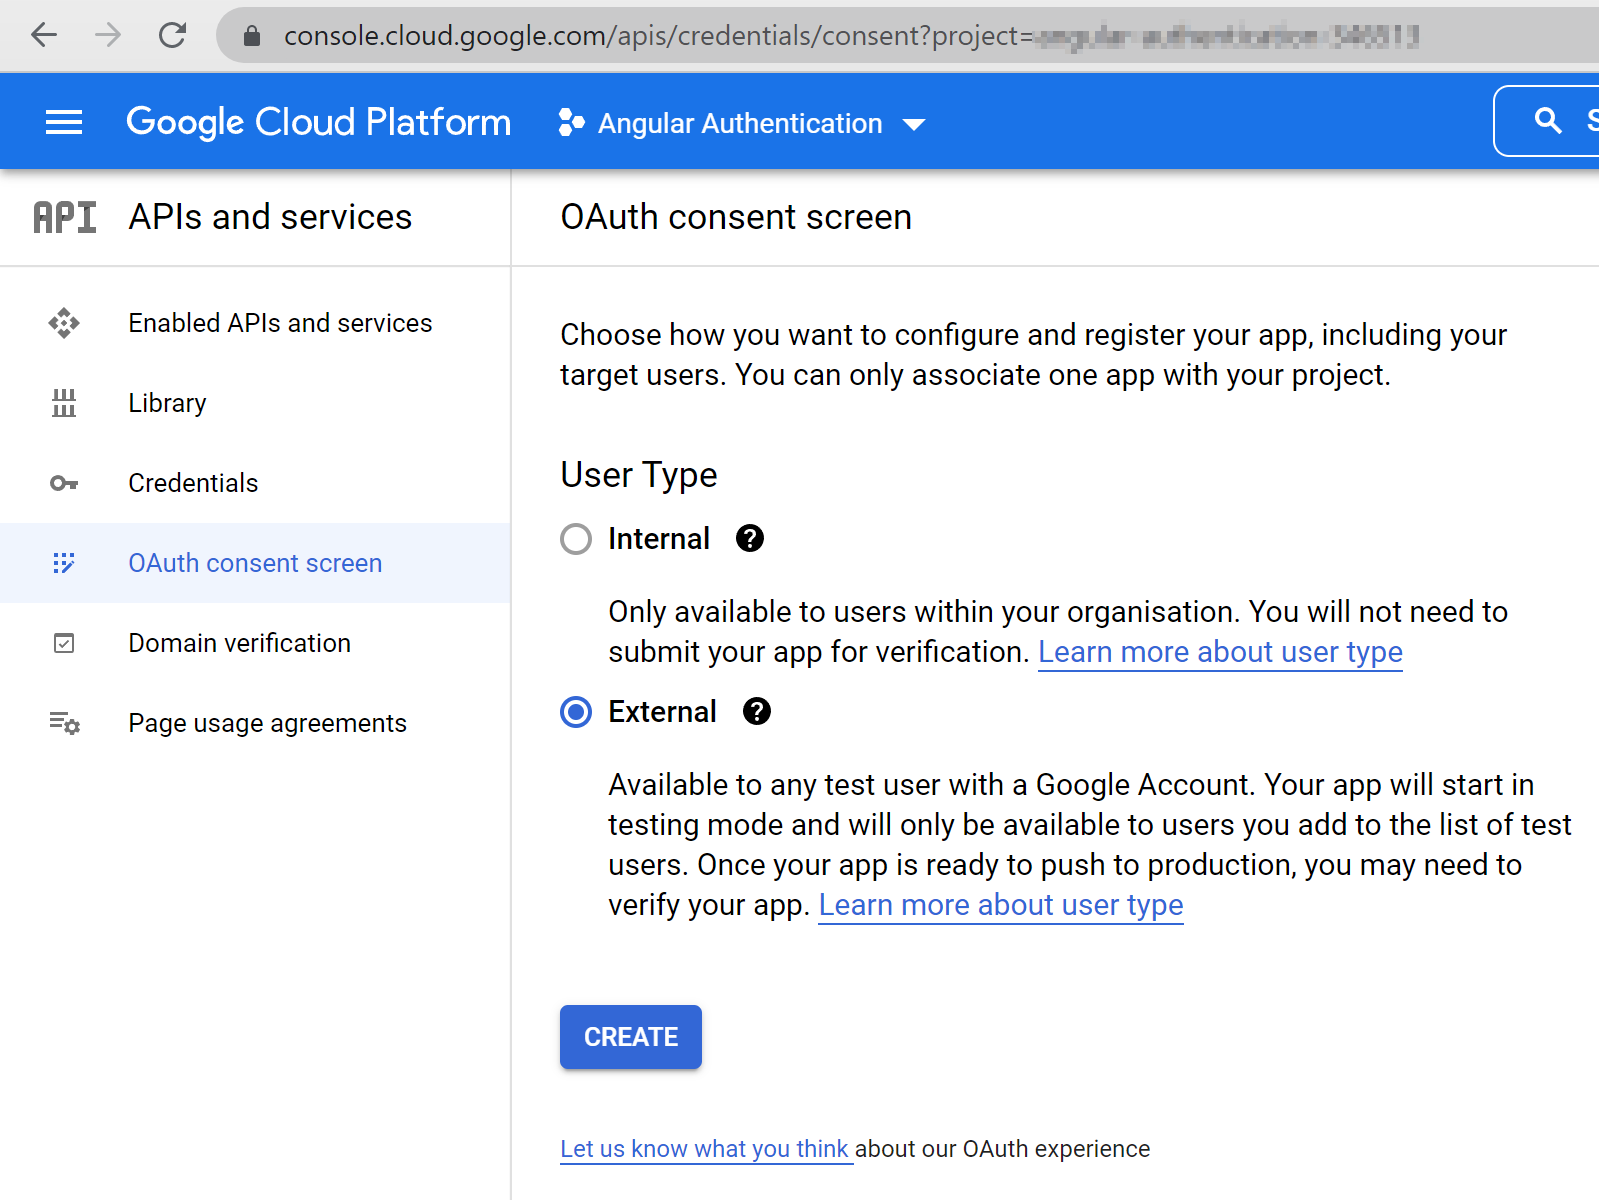
Next, we need to set up the OAuth2 consent screen. Go to the OAuth consent screen setup page. Choose “External” user and press the “Create” button.
Proceed to app registration.
OAuth consent screen
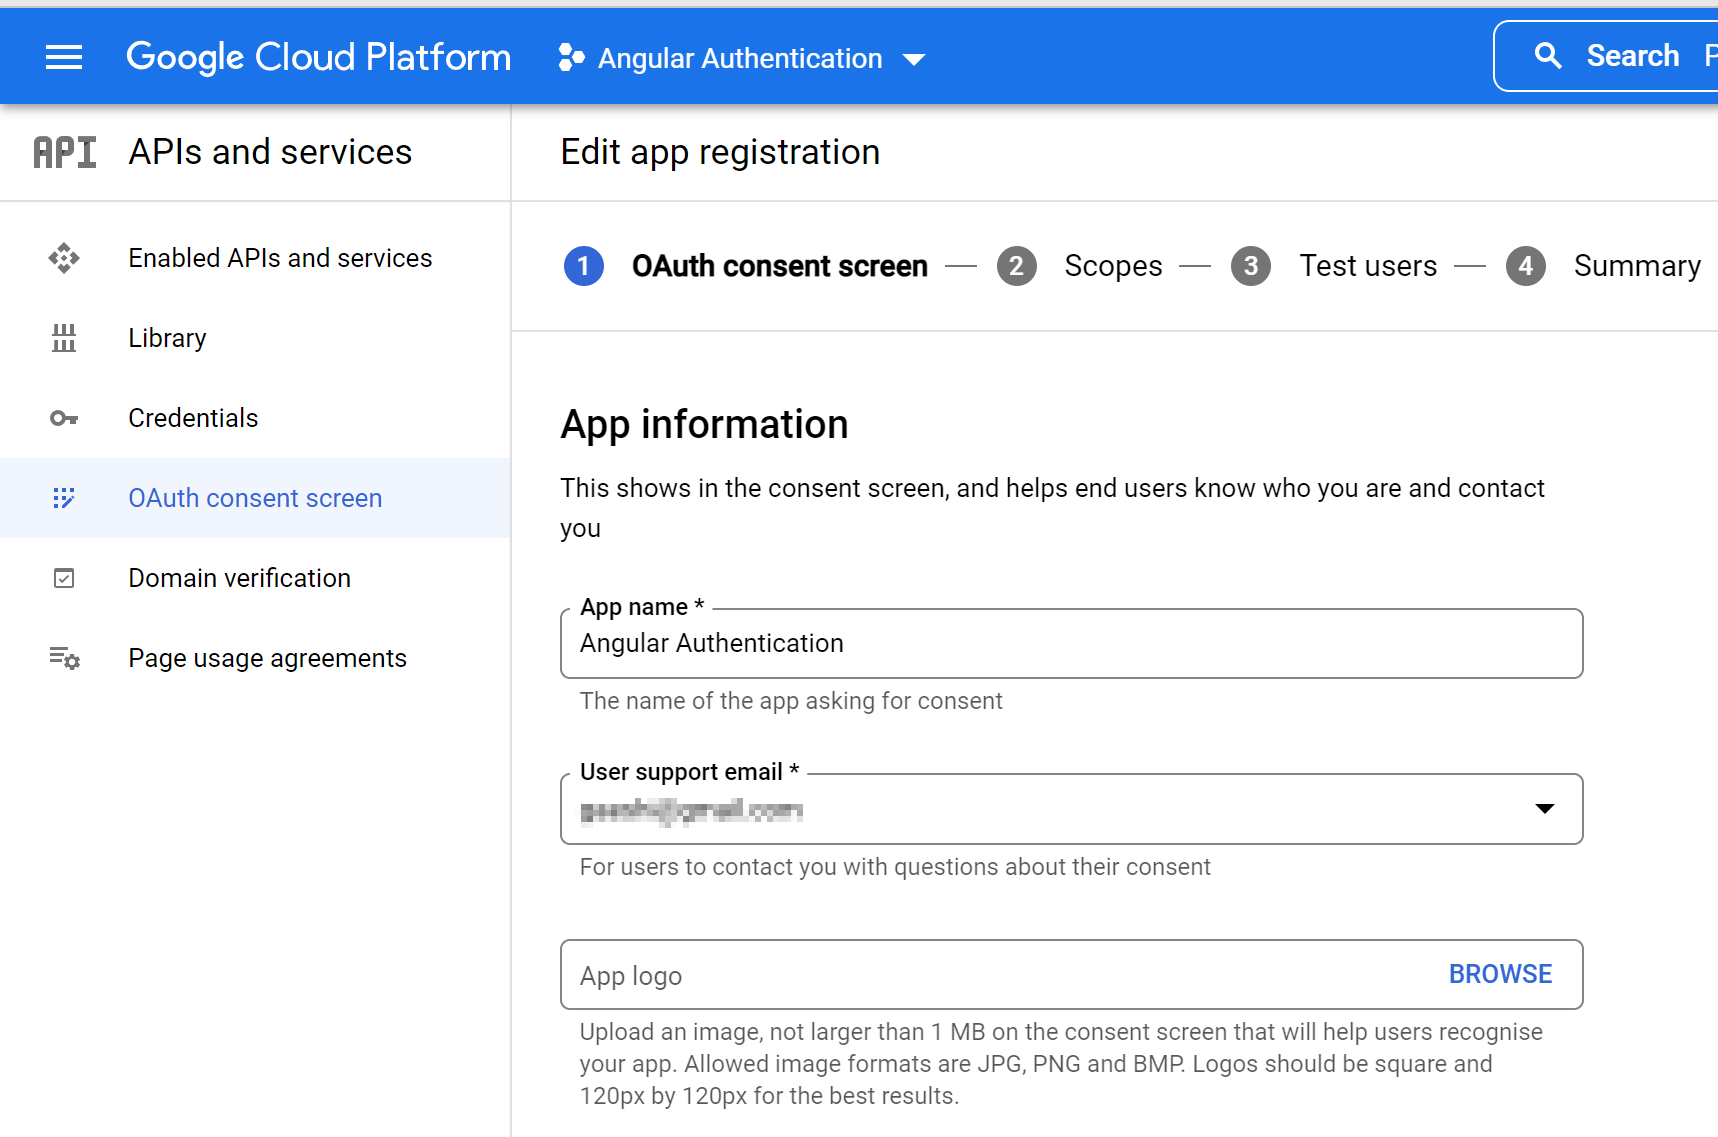
On the first page (“OAuth consent screen”), fill in the required fields: in App information - “App name” and “User support email”, and “Email addresses” in Developer contact information.

Press the “Save and continue” button to proceed to the next step.
Scopes
On the second page (“Scopes”) we can choose scopes. For our purposes, we will select the following scopes:
.../auth/userinfo.emailSee your primary Google Account email address.../auth/userinfo.profileSee your personal info, including any personal info you’ve made publicly availableopenid
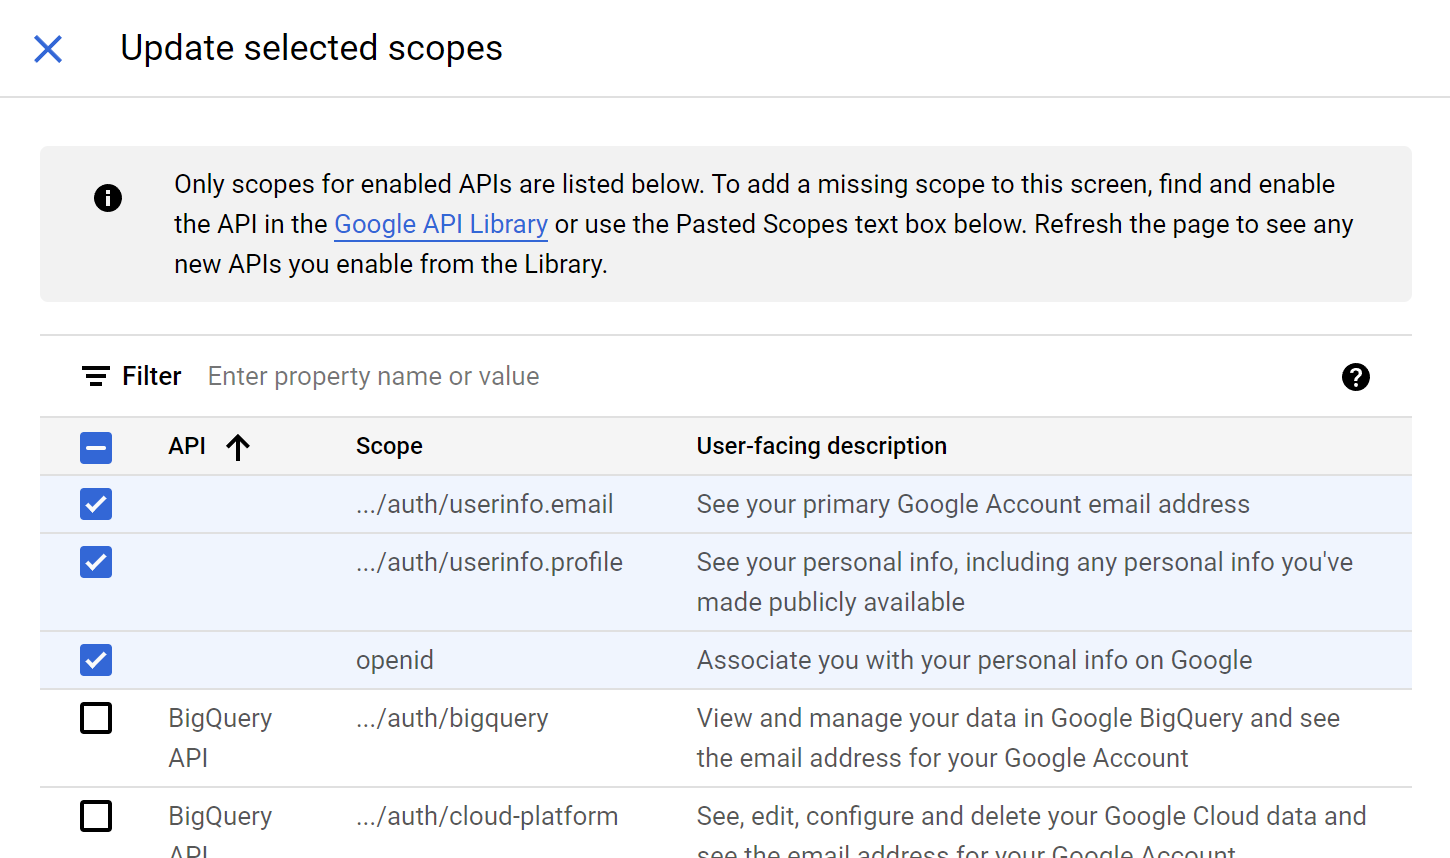
Press the “Add or remove scopes” button, and then on the right pane select the three scopes as shown above. After that, press the “Update” button.
Confirm that the scopes appeared under “Your non-sensitive scopes”:
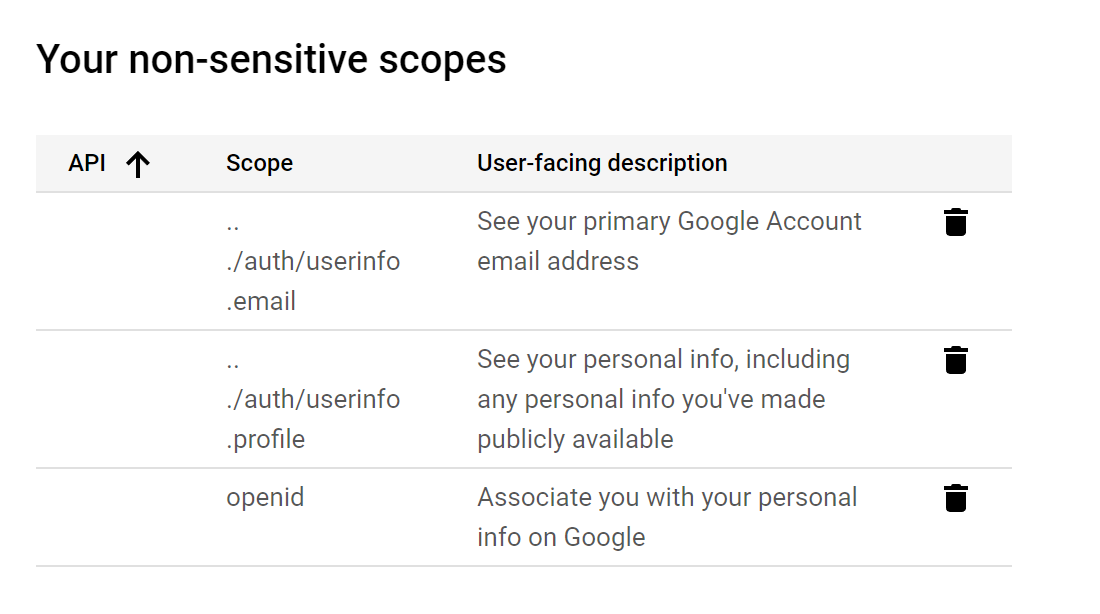
Press the “Save and continue” button to proceed to the next step.
Test users
Because we’re not going to be publishing our app for this article, we need to add test users for our app. Press “Add users” and add an email or two to the list. You can add and remove test users any time later, too.
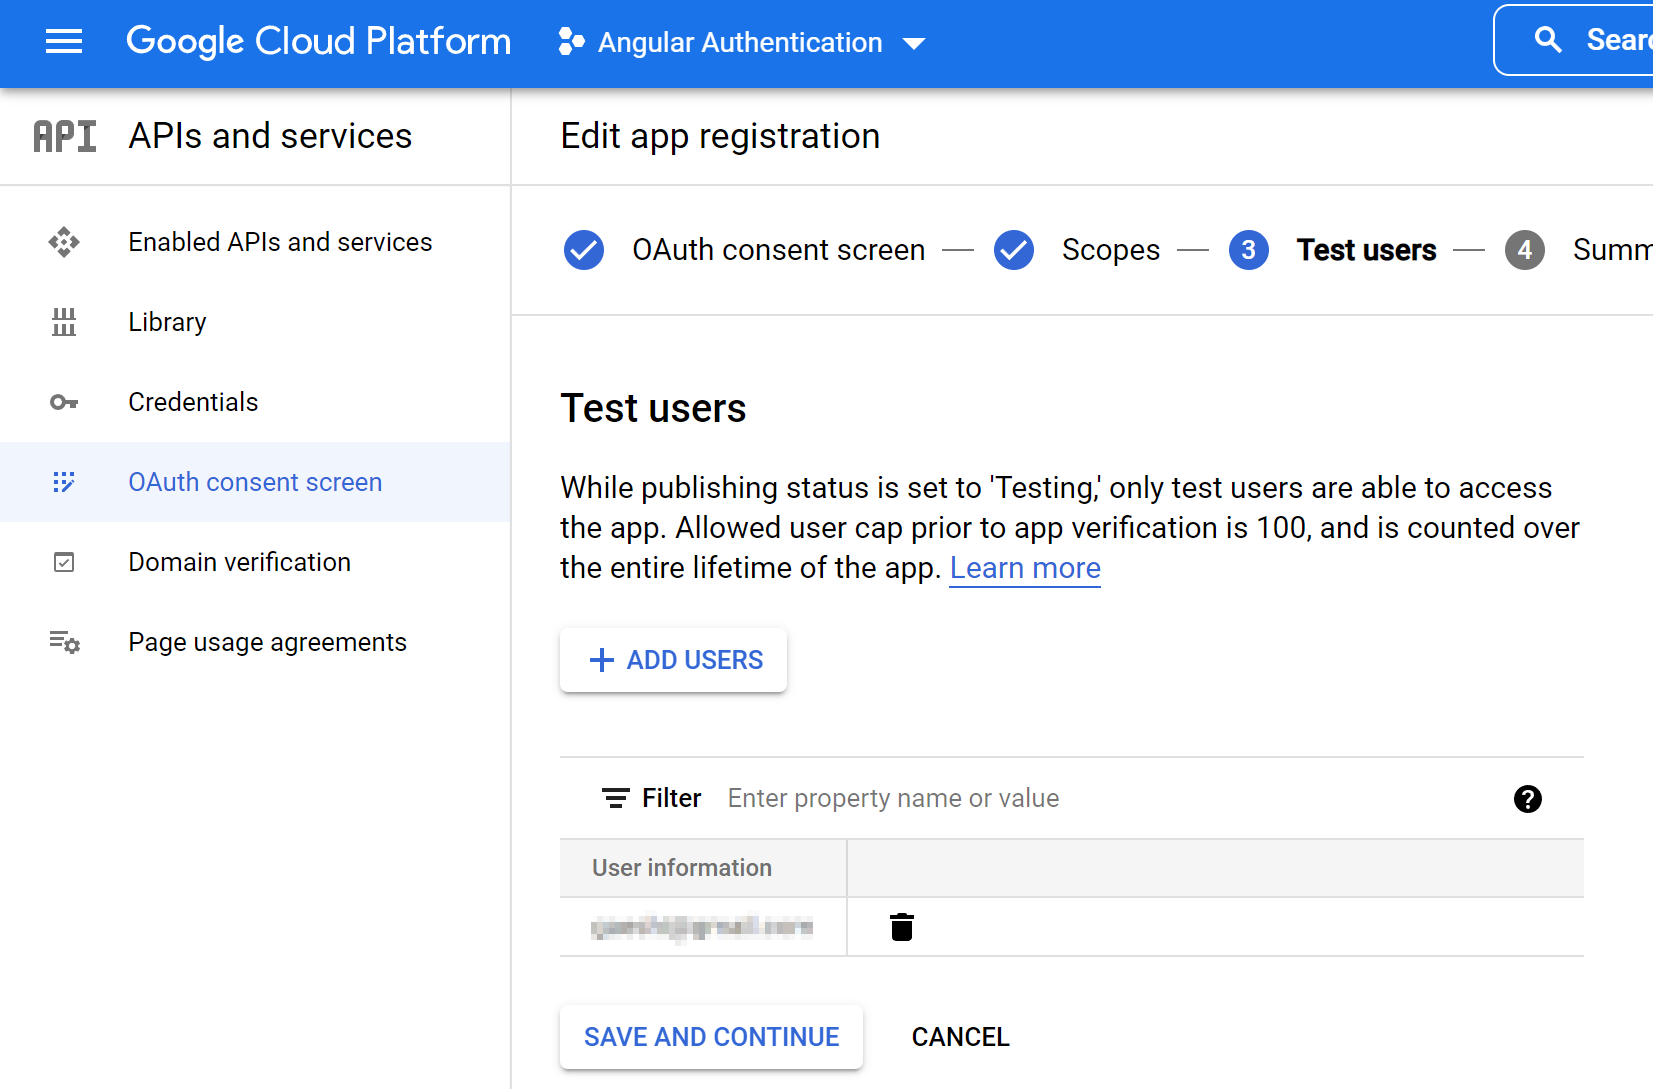
Press the “Save and continue” button to proceed to the final step.
On the summary page, you can review the OAuth consent screen settings. Press the “Back to dashboard” button. Your app registration is now complete.
Create OAuth2 client credentials
Next, we need to register a new client. OpenID Connect is an identity layer on top of the OAuth 2.0, and we can use it with Google OAuth clients. Go to the GCP Credentials page and press the “Create Credentials” button and choose the “OAuth client ID”:
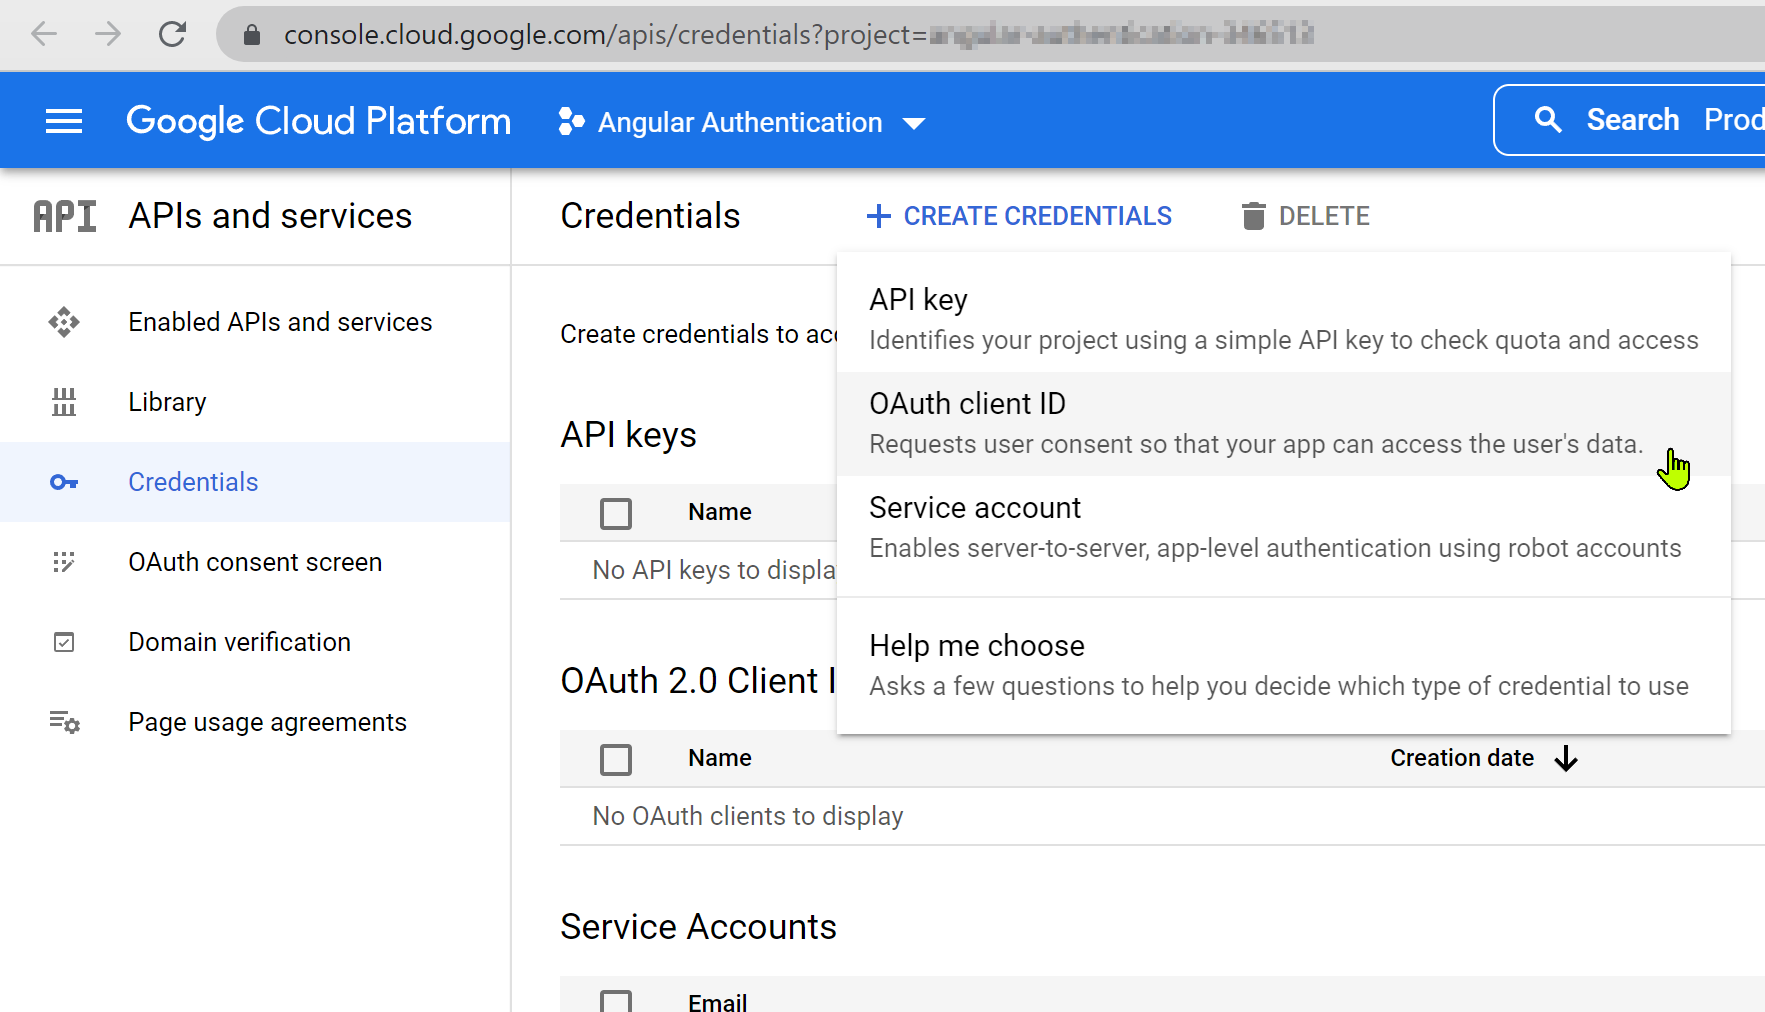
In the “Create OAuth client ID” page that appears briefly, choose “Web application” in Application type, and type an application name into the “Name” field. This string will be displayed on the OAuth consent screen.
In Authorized JavaScript origins, type http://localhost:4200.
In Authorized Redirect URIs (sometimes called Callback URL), type http://localhost:4200/.
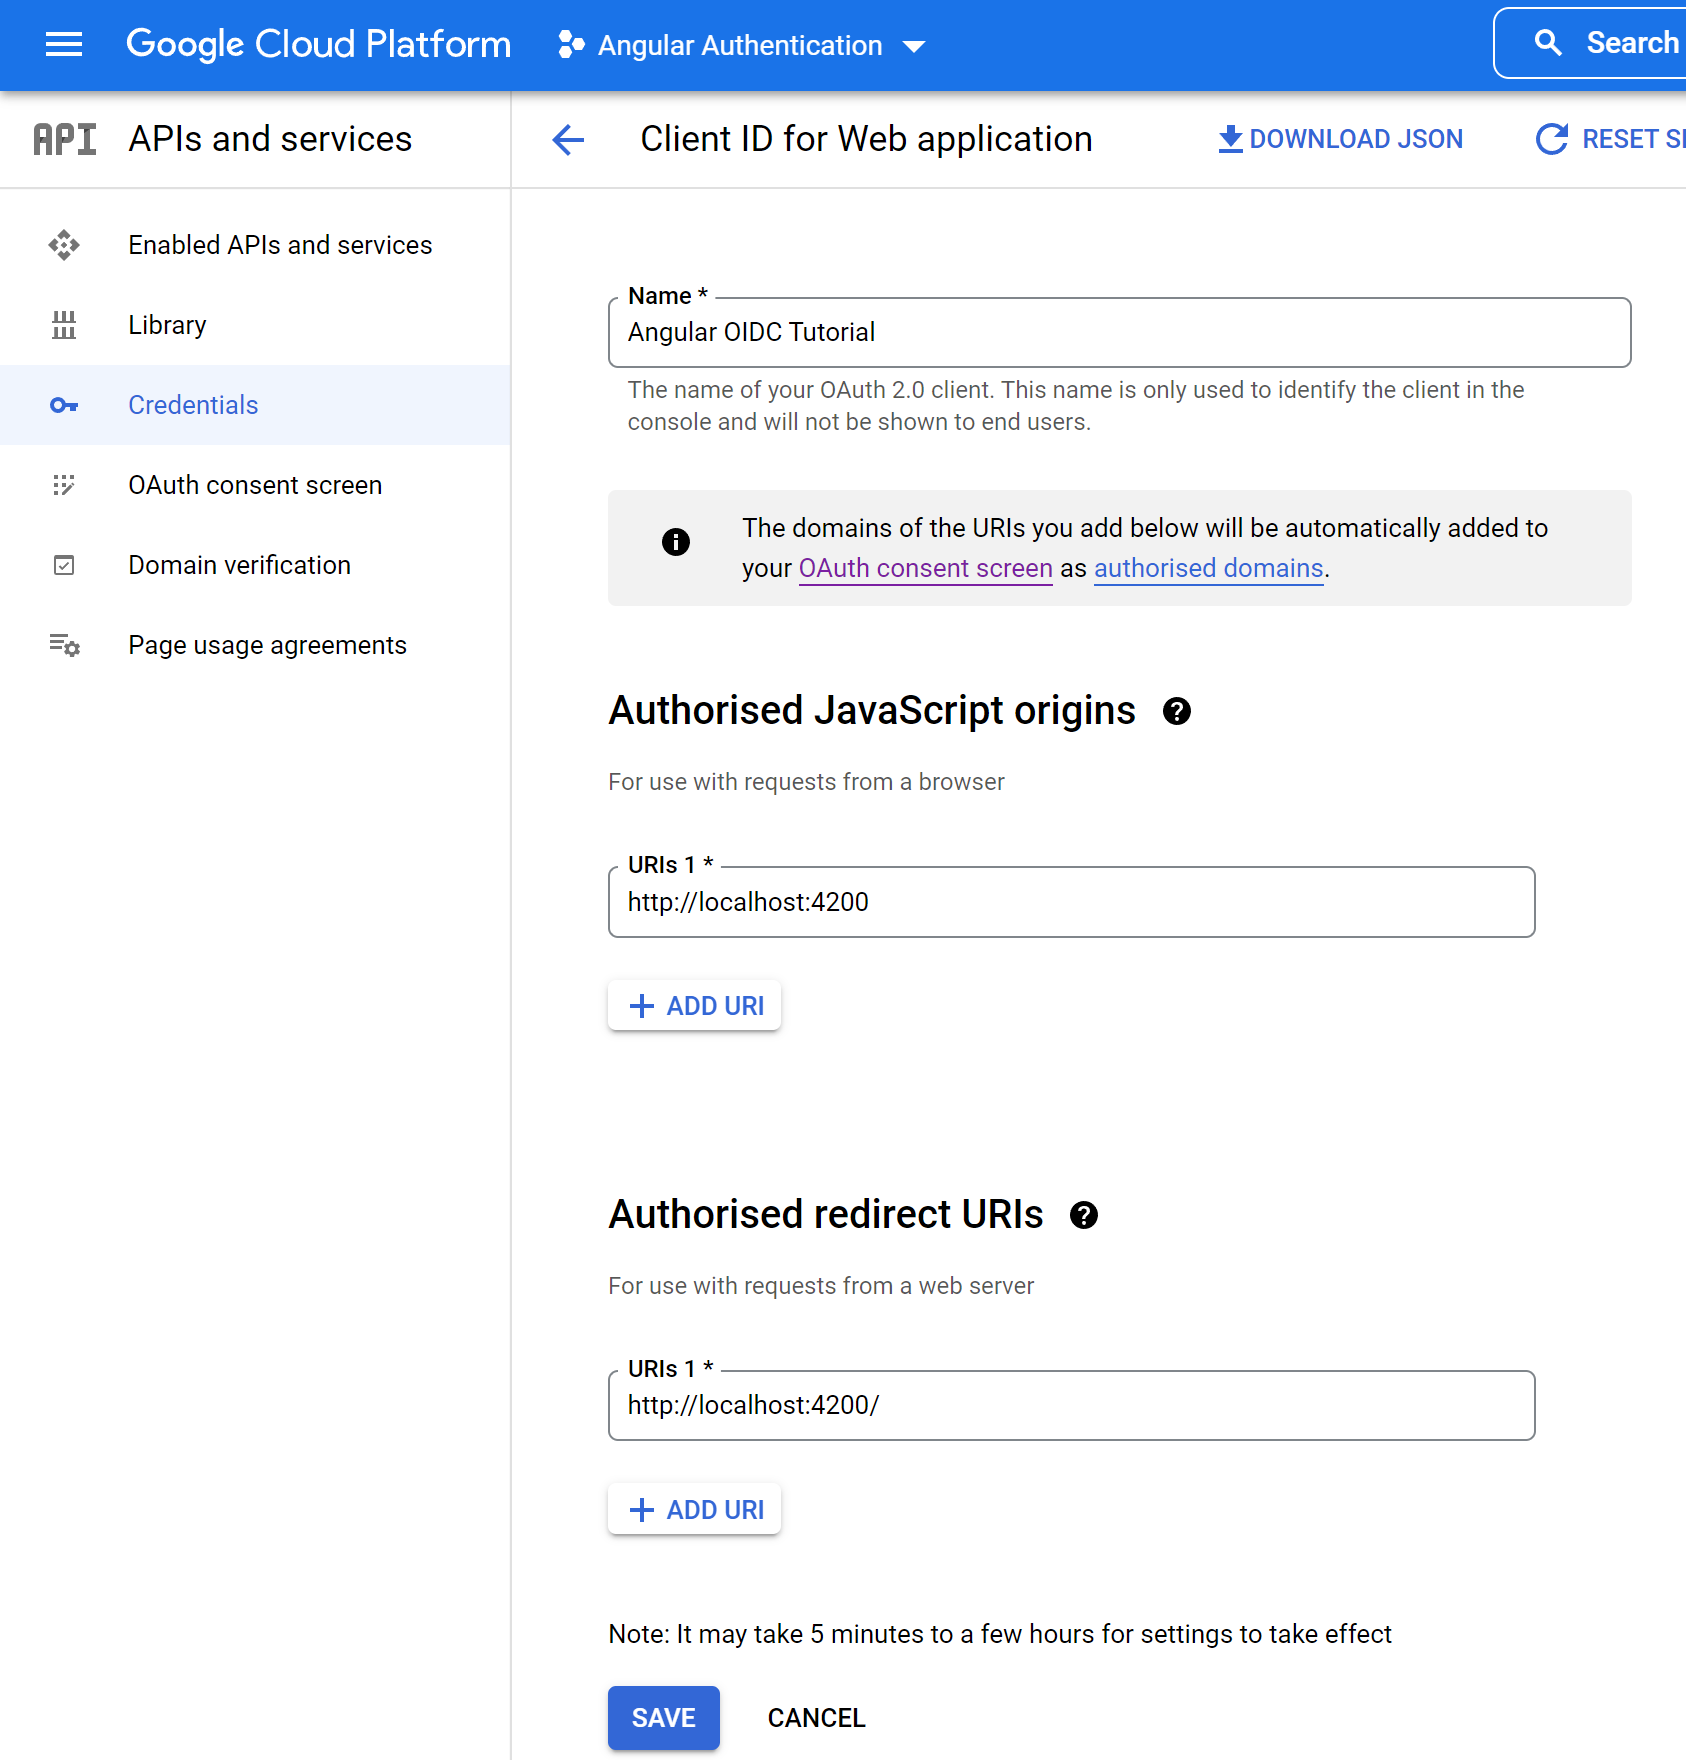
After pressing the “Create” button, a popup with the app credentials will appear. Note the Client ID on this popup. We’ll be using it in a later step to configure the OIDC client library.
Finally, let’s get to some coding! In the next chapter, we’ll create and configure the Angular app to support sign-in using Google Identity.
Angular Application
In this part of the article, we will go through the following steps:
- create a new client application using Angular CLI
- add an OpenID Connect client library
- configure the app as an OIDC client
Create a new Angular app
We can easily generate a new Angular app using Angular CLI. An old and proven way is to install Angular CLI globally.
A quick way to try Angular CLI without installing it globally is to use npx. We’ll show this approach in this blog post. Execute this command in your terminal window:
1 | npx @angular/cli@13 new angular-google-oidc --routing --minimal --style scss |
Add Angular OIDC client library
Next, let’s add the OIDC client libraries to our Angular app:
1 | npm i angular-oauth2-oidc angular-oauth2-oidc-jwks |
Import NgModules
We will be making HTTP requests from our Angular client, so we need to manually add both HttpClientModule and OAuthModule to app.module.ts:
1 | //... |
Configure the app
The configuration steps will have slight differences among the providers, but the overall flow is almost the same everywhere.
Create OIDC configuration for implicit flow
Let’s now create the AuthConfig for our client app to use with Google Identity.
Create ./src/app/auth-config.ts file and paste the following source code (set the clientId value to the one provided in the GCP configuration steps):
1 | import { AuthConfig } from "angular-oauth2-oidc"; |
Google Identity provider documentation on OAuth 2.0 for Client-side Web Applications is using implicit flow, therefore we start with configuring our Angular client for it. Note, that there is another approach called “Authorization code flow with PKCE” recommended as the current security best practice. Google Identity only supports authorization code flow with confidential clients. SPAs are public clients, therefore we cannot use this flow without a backend.
Note: we’re setting
clearHashAfterLogin: falseso that we can inspect the URL fragment after login. In production, you would want to keep this setting at its default value oftrue.
Note 2:strictDiscoveryDocumentValidation: falseis currently needed because Google’s discovery document doesn’t conform to the library’s validator requirements (“Every url in discovery document has to start with the issuer url”).
Configure App Component
Let’s wire up the OpenID Connect authentication logic in the app component of our Angular application.
1 | export class AppComponent { |
This boilerplate is enough to set up our Angular application to enable OpenID Connect with the implicit flow.
Note: JwksValidationHandler deals with token validation logic and is necessary for implementing OpenID Connect the implicit flow. Note, that this dependency will not be needed for the OpenID Connect authorization code flow with PKCE.
Implement basic Login / Logout functionality
Finally, let’s implement a component method to check if the user is logged in, and another one to initiate the login flow / logout:
1 | get isLoggedIn() { |
… and add some html template code:
1 | <button (click)="handleLoginClick()">{{isLoggedIn ? 'Logout' : 'Login'}}</button> |
Now let’s run the app and see how it works.
1 | ng serve -o |
In the Network tab in the Developer console, we can immediately see the following two calls being made by our Angular application:

The first call is to https://accounts.google.com/.well-known/openid-configuration. The .well-known/openid-configuration is a suffix appended to the issuer URL we provided in the AuthConfig above. This endpoint stores a JSON file, that contains OpenID Connect configuration metadata. One of the keys is jwks_uri with the value https://www.googleapis.com/oauth2/v3/certs.
Alright, now let’s finally click the “Login” button! If everything was set up correctly, we will be redirected to the Google login form:
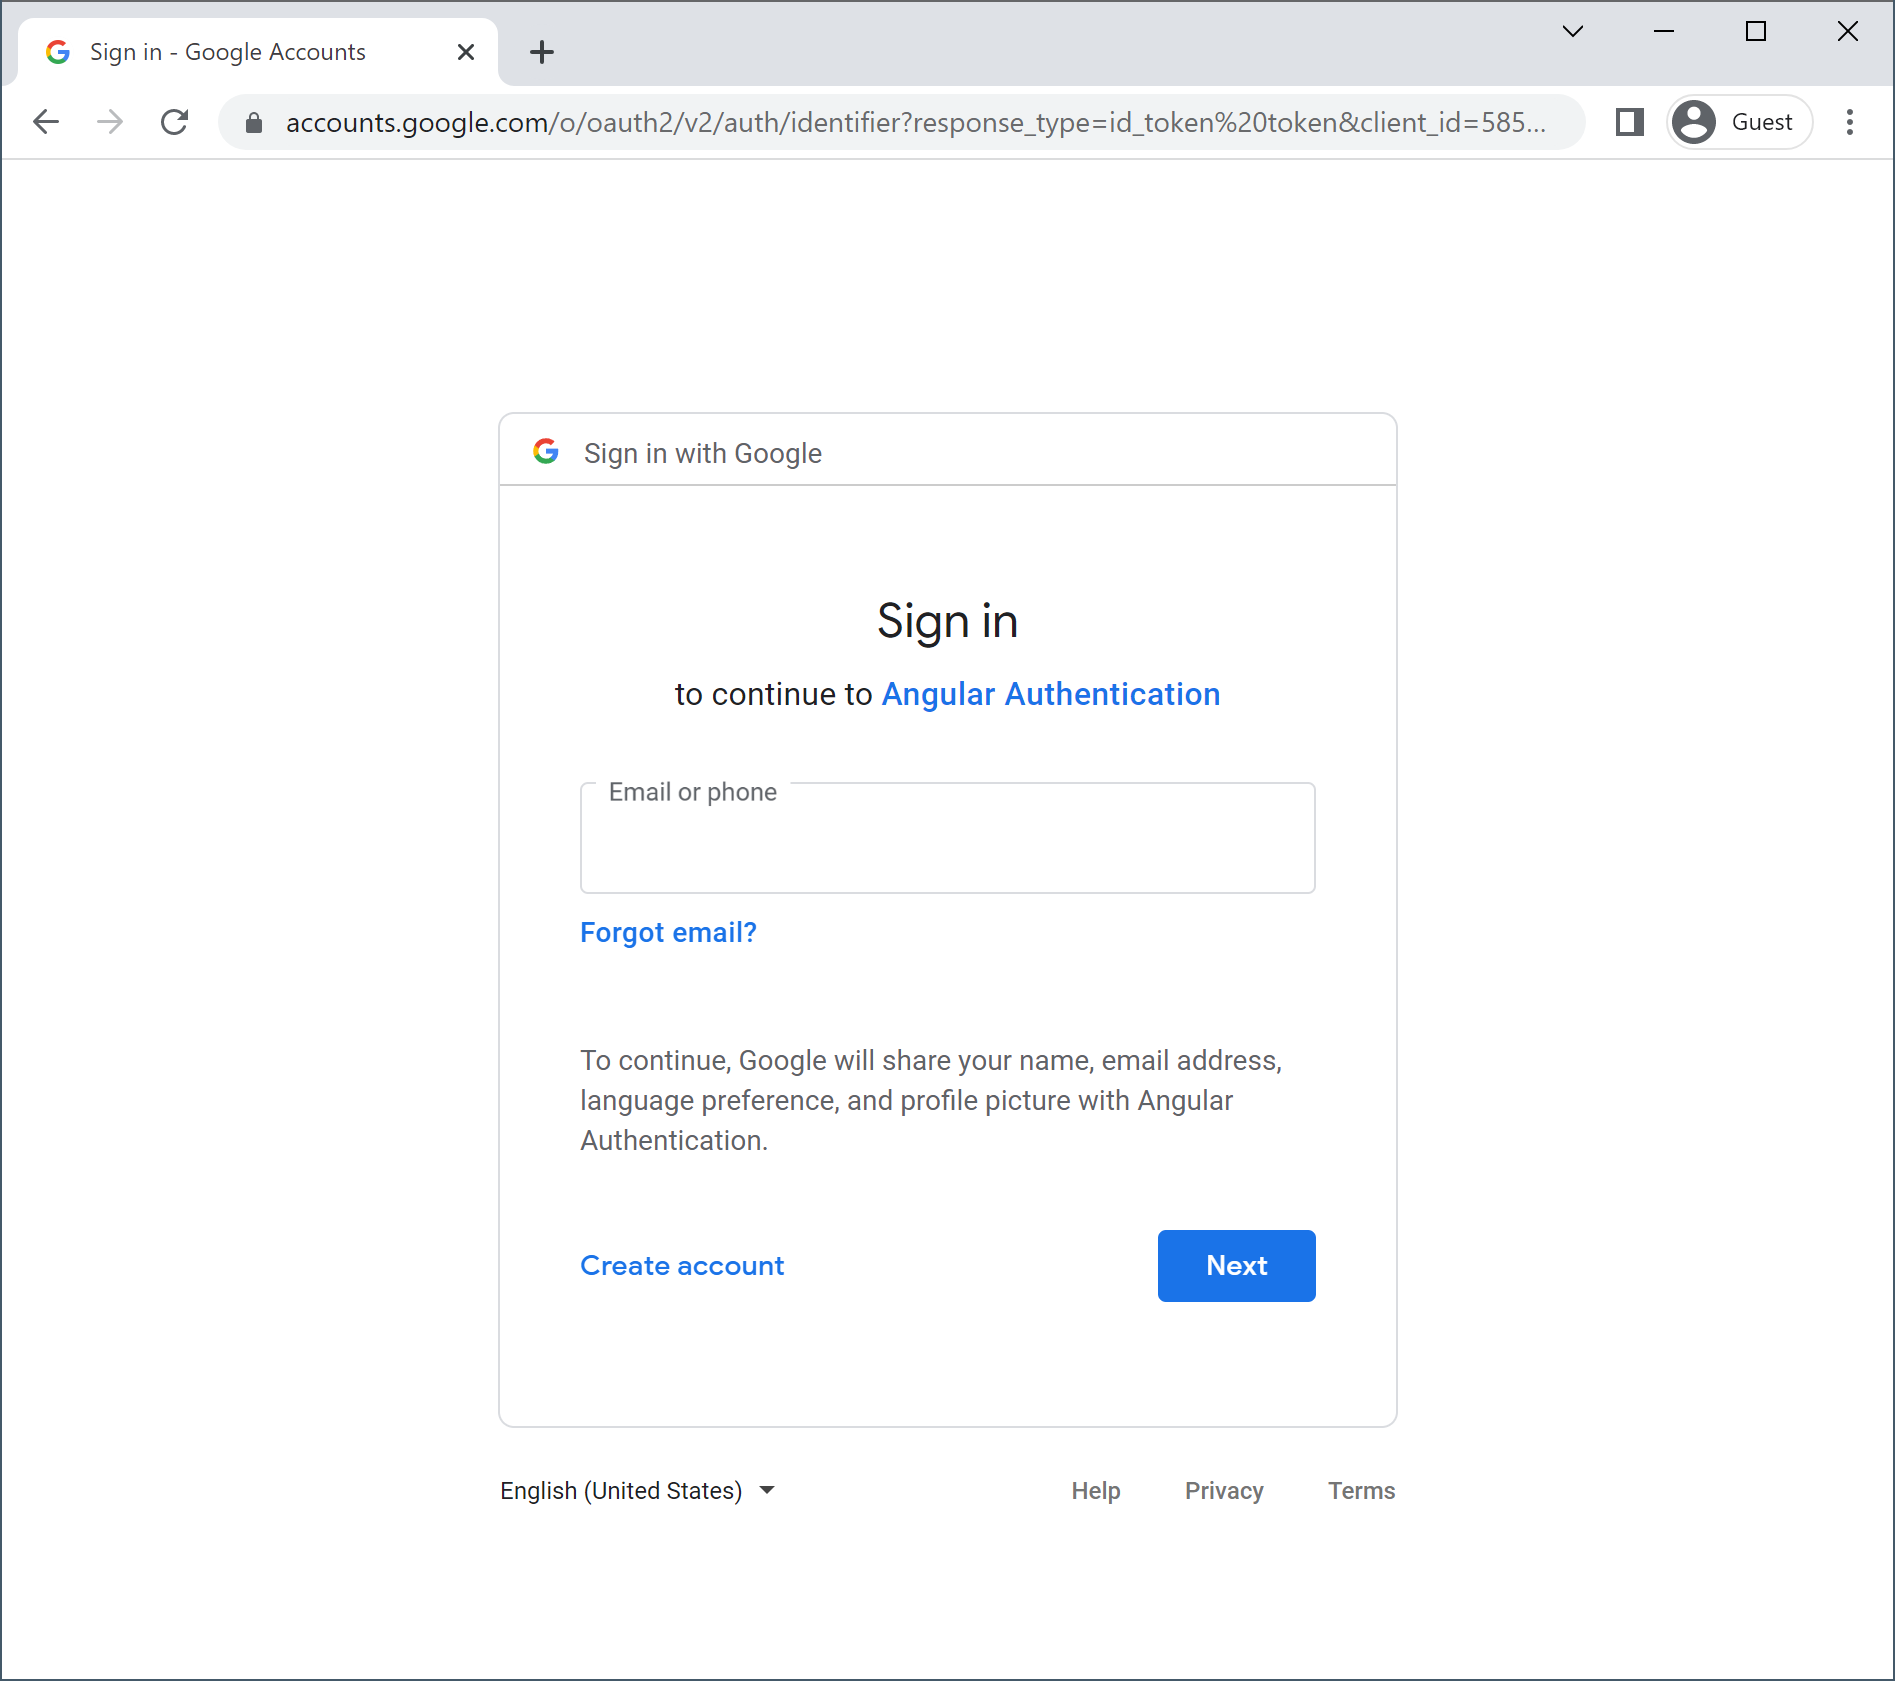
Upon providing the credentials, we get redirected back to our Angular application, with the URL fragment containing the following parameters:
state, which is a random string generated by the library. It is primarily used to mitigate CSRF attacks;access_token, which can be used to access web API that requires user authorization. The value of the access token should be added to the authorization header when accessing protected web APIs. Access token value is an opaque string in the case of Google, but may also be a JWT.token_type, which always has a valueBearerin OIDC;expires_in, which is a lifetime of Bearer token in seconds. Google’s authorization server generates the tokens with the validity of 1 hour, so the value will most likely be3599;scope, which in our case will beemail profile openid https://www.googleapis.com/auth/userinfo.profile https://www.googleapis.com/auth/userinfo.email. This is the setting we selected during the app registration process;id_token, which is a JWT containing the information about the authenticated user. We will use a couple of the claims about the user in the ID token later in an example, to show the name and the profile picture of the user;authuser, which is a parameter specific to the Google OIDC identity server. If you have more than one user profile, this value will contain a 0-based integer value showing which user profile number was used to log in;prompt, which may contain valueconsent. In that case, Google will display the user consent screen every time the app requests any API scope, even if a user already granted it previously.
Note that the refresh token was not issued in the response.
These parameters get parsed by the Angular auth OIDC client, and the parsed user object is then available to the client application from the oauthService.
Display information about user
Finally, let’s add some code to show some data about the authenticated user, such as name and profile picture. This user data is available to use because we requested OpenID Profile scopes.
To access the identity claims in our component, add the following code:
1 | get claims() { |
We can then access the claims on our “Login page” in the HTML template of our component like this:
1 | <div style="display: flex; margin: 1rem; align-items: center"> |
As we configured the library to automatically log in, we don’t need to press the “Login” button to immediately see the results of updating the HTML template of our component, such as these:
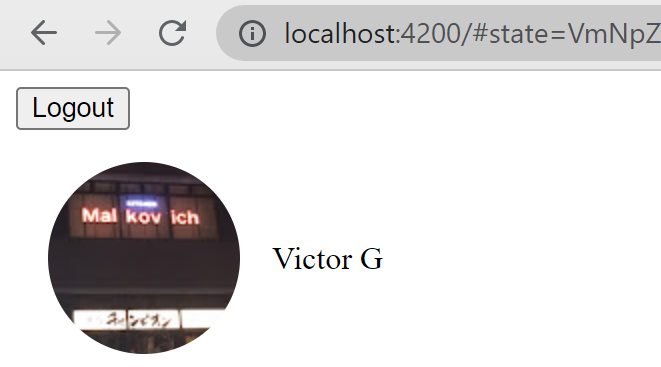
Press the logout button, and the user’s profile picture and name should disappear.
Conclusion
In this post, we took a look at how easy it is to implement login using OpenID Connect in Angular apps.
In the following posts, we will continue exploring the library, upgrade our Angular app to use Authorization code flow with PKCE, review what is a proof key and why it is needed, extract the user profile component, create a new component and use it in a protected page / route, that it is only visible to an authenticated user. Since protected routes are usually implemented using an auth guard, to decouple auth service from application logic, we will create a new service and use it in the auth guard. Finally, we will use an access token to call a private HTTP API.



Comments