

Table of Contents
Introduction
With the help of Angular, an open-source Javascript framework, the creation of dynamic web apps has become significantly easier. We can use HTML as a template language to make the program more clear and understandable. Angular requires very less coding because of its data binding and dependency injection capabilities. It is compatible with all server technologies.
Angular’s ability to convert static HTML into dynamic HTML is one of its most important characteristics. Because of the capabilities and components that it already possesses, it is referred to as an HTML extension.
The way a dynamic website handles the dynamic data entered by the user is one of its key characteristics. Forms are primarily used in this case. We can easily create these forms with Angular. We must validate the accuracy of the user’s input when using forms. Form validations can be used to attain this. Angular has an excellent capability for validating user inputs and displaying error message or alerts on the screen when deploying an application. It also has built-in validators to help with the verification process.
Forms are used when we wish to collect data from website visitors. Forms are used every day, for example, to register, log in to a website, place orders, and so on.
It may have a negative impact if we process the user’s input before verifying, and as a result, we may end up saving incorrect information such as the wrong name, age, mobile number, email address, etc.
Javascript is commonly used to validate HTML forms, but it necessitates a lot of coding. Because of Angular’s full-featured framework status, it is a strong supporter of user input validation and the display of validation messages. It enables us to use various built-in validators as well as create our custom validators.
Angular forms
Forms can be simple or complicated. It is entirely up to the form’s creator how many fields they want to include, as there is no limit to the number of input fields that can be included in a form. Now, the input fields can have one or more login validations. The form module is responsible for connecting the form field to the component class.
This class now tracks changes made to form fields. The built-in validators in Angular forms validate the user data that the user submits. We can design our validators. If the validation fails, the user will be shown an error message; otherwise, the form will simply proceed to the next step.
The two ways that forms are built in Angular are the template-driven forms approach and the reactive forms approach.
Template-driven forms method
It is the easiest method of creating forms because the logic is held in the template.
Reactive forms method
After the form is created in the component class, HTML elements are hooked to it. In this instance of form creation, the logic is preserved as an object within the component, making component testing easier.
An Angular form is similar to an HTML form with a few additional features. We require a FormControl class object for each form field (input, radio, search, submit, etc.). These FormControl objects provide information about the fields. Its value, whether or not the value is valid, what validation errors exist, and so on.
It also provides information about the field’s condition, such as whether it has been touched or is untouched, whether it is pristine or dirty.
A FormGroup is an array of FormControl objects. At least one FormGroup is present in every Angular form. Multiple FormGroups are possible, and they can be useful in a variety of situations, such as managing the personal information and professional information sections of a user registration form separately.
FormControl has access to all of FormGroup’s properties (valid, invalid, pending, etc.). For example, if all FormControl instances are valid, the valid attribute will return true.
To provide validation to an Angular form, two things are required:
- The form must contain at least one FormGroup object.
- Each field in the form is assigned a FormControl object.There are two ways to design these control objects. We can define a few directives in the form’s template, and Angular will create the controls from the base. The term “template-driven forms” refers to forms created in this manner.
If we want more control over our form, we can formally create control objects. These are examples of reactive forms.
Some setups
Check the Node version that is currently installed on your system. Run the command below.
1
node --version

Use the following command to see what version of npm is currently installed.
1
npm --version

Now use the following terminal command to install the most recent version of Angular. Here, the “-g” flag designates a global installation of the package.
1
npm install -g [email protected]
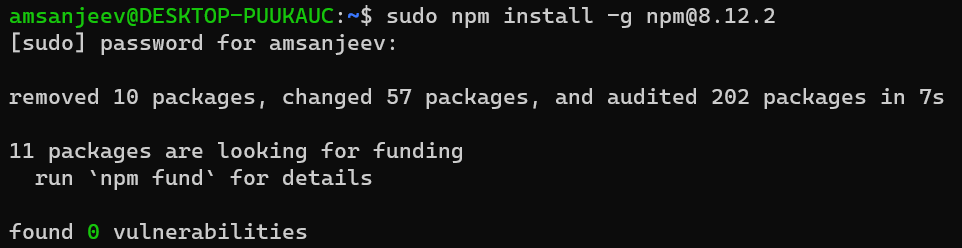
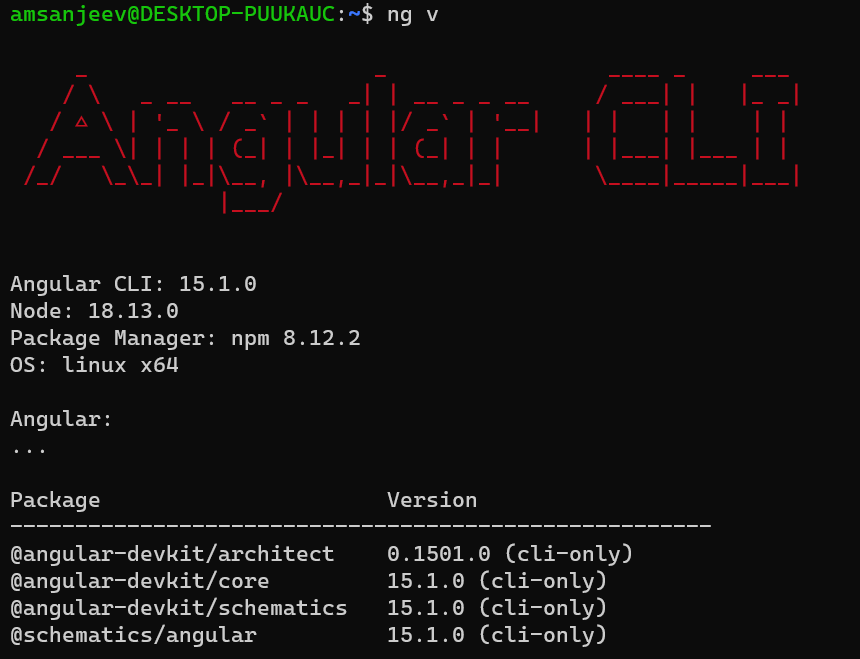
Once the above command has been properly executed, a new version of Angular CLI will be made available. We can check our updated versions of the Angular CLI with the command below:
1
ng v
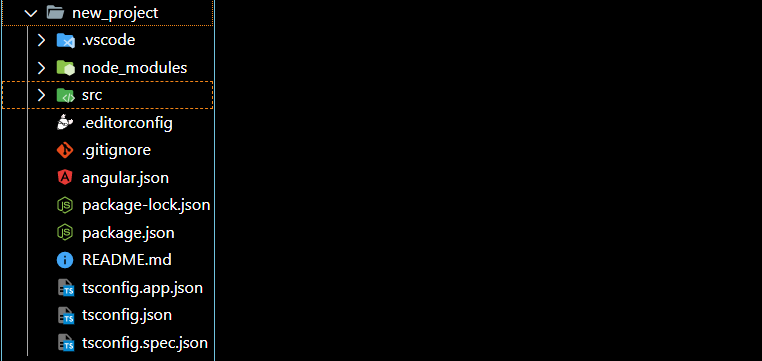
We’ll now start a new project, “new project.”
1
ng new new_project

Now open VS Code and select the newly created folder.
Now run the following command in the terminal to see if the main program is functioning properly at this point.
1
ng serve
Now check to see whether it’s working by opening your browser to
http://localhost:4200/.
We’re now ready to begin.
Template-Driven forms
In Template-Driven Forms, we focus on the actions and validations by using directives and attributes in our template and letting it work behind the scenes. Everything happens in Template. The component class requires very little coding. The logic and controls are not defined in the component class here. It is utilized to build straightforward application forms.
All of the components that are being created are located in the src/app folder. We can add another component inside of this one by using the command given below.
1
ng g c component_name
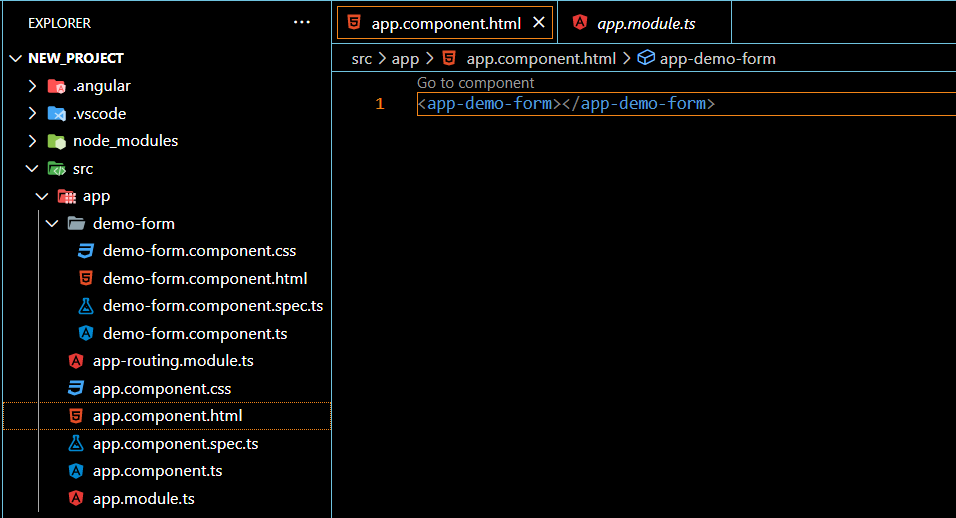
Here I’ve named my component as demo-form.
Our newly created component will now show up once we have completed this. More component files are included in this component as.ts,.html, andcssfiles.We’ll now access the component.html file and call the component tag we just made. This is done in order to integrate the created component into our application. In the case of our project here, it will be:
1
<app-demo-form></app-demo-form>
Now Open app.module.ts and import FormsModule from ‘@angular/forms’ also call it in imports.
1
2
3
import { FormsModule } from '@angular/forms';
imports: [BrowserModule, AppRoutingModule, FormsModule];Let’s now create the form. Add the following code to demo-form.component to create the form.
1
2
3
4
5
6
7
8
9
10
11
12
13
14
15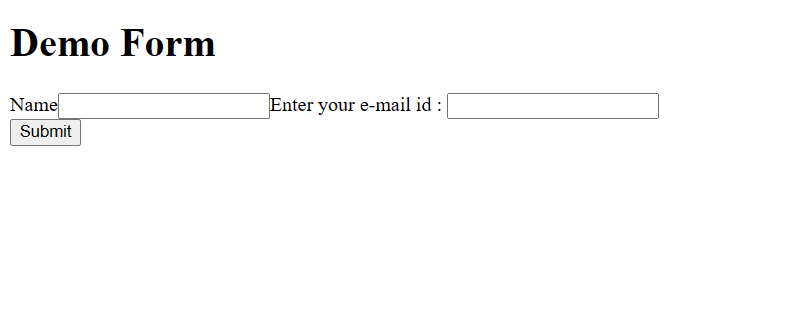
16<div class="container">
<h1>Demo Form</h1>
<form>
<div class="form-group">
<label for="name">Name</label>
<input type="text" class="form-control" id="name" required>
<label for="email">Enter your e-mail id : </label>
<input type="email" class="form-control" id="email" required>
</div>
<button type="submit" class="btn btn-success">Submit</button>
</form>
</div>Our basic form is now complete, and we can use the terminal’s “ng serve” command to launch it.
When using ngModel, we must either declare the FormControl as “standalone” in ngModelOptions or specify the name attribute to stop Angular from producing an error. Additionally, FormsModule must be added to the array of imports in app.module.ts
Validation in Template-driven forms
Angular has a few built-in validators to verify common use cases. If we want the validations to use built-in validators, we would need to apply validation attributes to every form field. These validation attributes are identical to the common HTML5 validation attributes like required, minlength, pattern, etc. Angular offers a few directives to match these characteristics with the validator methods listed in the Angular framework.
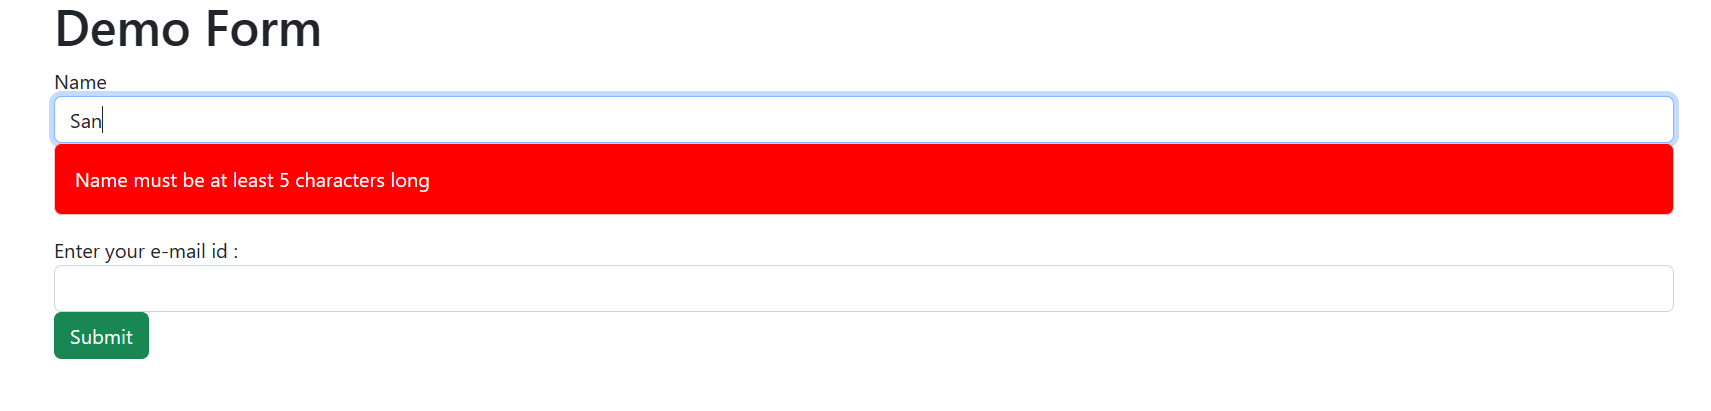
Every time a FormControl’s value changes by performing validation, Angular displays a list of validation problems. The status is valid if the list is empty; otherwise, it is invalid. Now, let’s say we wanted to add the following validations:
- The name field has the required attribute; if this field is left blank, we want to show some error message.
- The minimum and maximum character lengths for the value in the Name field should be 5 and 30, respectively. if not followed, we want to show validation messages.
For this, we must add the proper validation characteristics and export ngModel to a local template variable for each form control where we wish to add validation. By appending ngModel to all input tags, we can import all of the specific ng contents into our form.
But how will we know whether or not the contents have been imported?
Open the browser and inspect the input tag for this. You’ll notice that a class called ngcontent and a few other ng classes have been added, indicating that Angular has identified our demo-form.

Now that our form has been submitted, the submit method and a method called form method should both be called.
We will do this by including the following code in our
formtag.1
(ngSubmit)="submit()"

then, using the following code, we’ll define this submit method in our demo-form.component.ts file:
1
2
3
4
5
6
7
8
9
10
11
12
import { Component } from '@angular/core';
({
selector: 'app-demo-form',
templateUrl: './demo-form.component.html',
styleUrls: ['./demo-form.component.css'],
})
export class DemoFormComponent {
submit() {
console.log('Form Submitted!');
}
}
Now, this method will be called each time we click the submit button. This can be verified in the console. The console displays “Form Submitted!” when we click the submit button.
Let’s add the login id to this as well, so that when you click the submit button, control will transfer to the submit(login) function and you can view the information that we entered.
- For this add the following code in demo-form-component.html
1
<form #userlogin = "ngForm" (ngSubmit)="submit(userlogin)" >
- then, add the following code in demo-form-component.tsNote: When we submit and inspect our form, we will see that callback functions have been called.
1
2
3
4
export class DemoFormComponent {
submit(userlogin: any){
console.log("Form Submitted!", userlogin);
}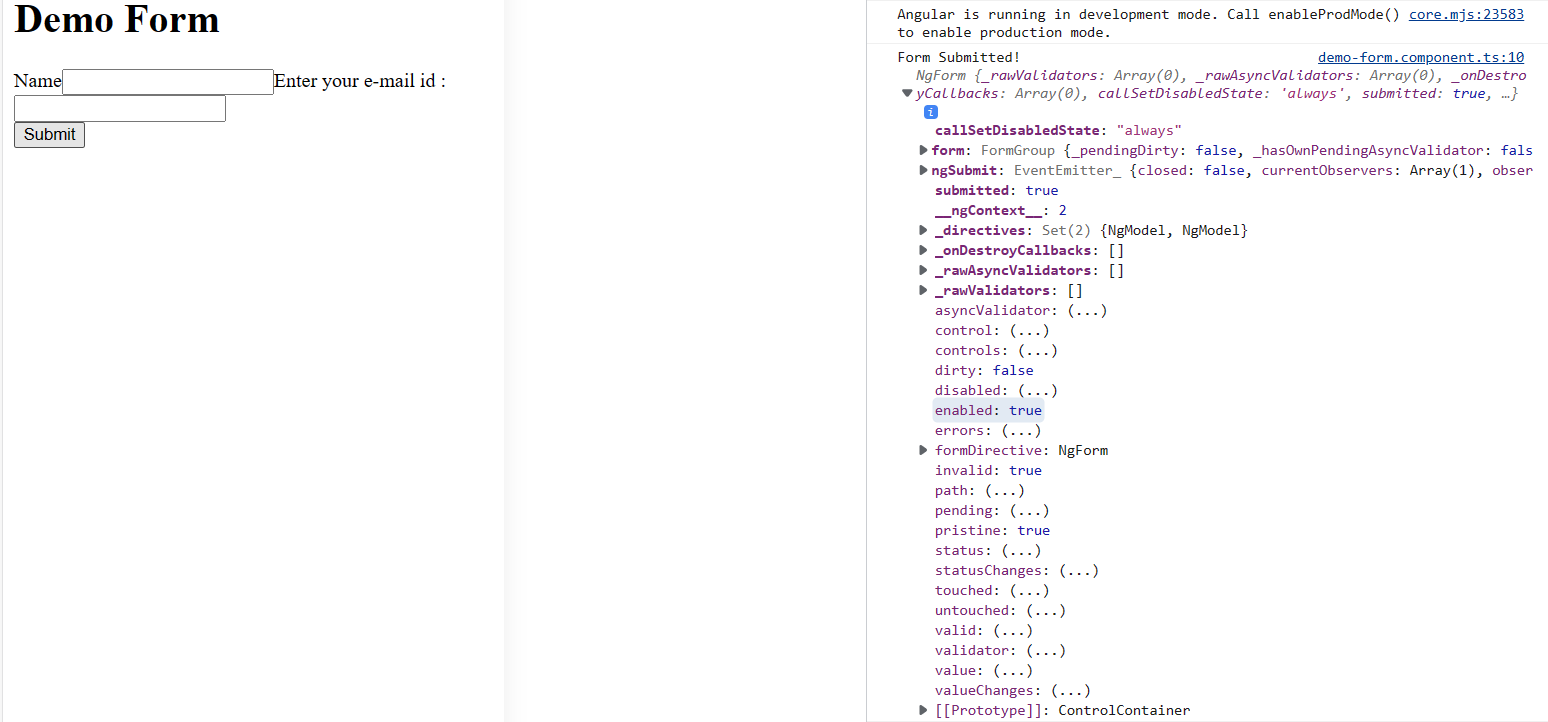 Here we can see details about the field’s state, including whether it has been touched or not, whether it is clean or dirty, and information about all of FormGroup’s properties (valid, invalid, pending, etc.). These are some of the things that we need to keep in mind when implementing form validation.As we can see from the screenshot above, there were numerous objects, such as valid and invalid, when we examined our form. We’re going to alter that now and use those objects as leverage. We are expected to include a template variable for that.
For this, we are going to add
#variable ="ngModel"to our input fields. Here I’ve named ourvariableasname.1
2
3
4
5
6
7
8
9
10
11<input
type="text"
class="form-control"
id="name"
required
maxlength="30"
minlength="5"
ngModel
name="name"
#name="ngModel"
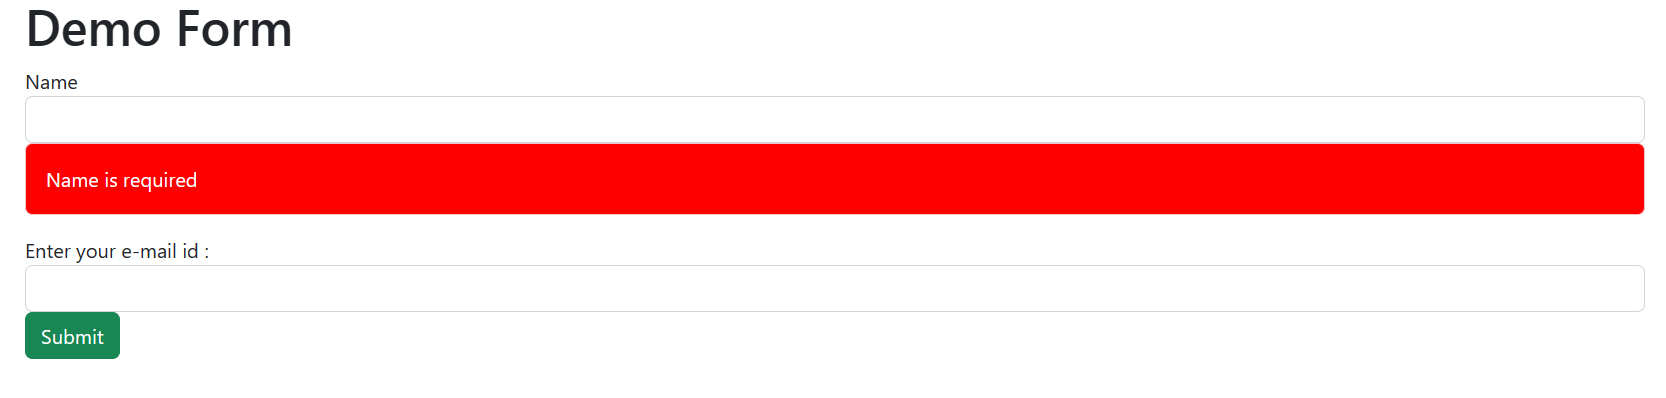
/>It now informs our users about the form and what is considered invalid input. We’ll add the following code to
demo-form.component.htmlafter creating a div under theinputtag.1
2
3
4
5
6
7
8
9
10
11
12
13
14
15
16
17
18
19
20
21
22
23
24
25
26<div class="container">
<h1>Demo Form</h1>
<form #userlogin="ngForm" (ngSubmit)="submit(userlogin)">
<div class="form-group">
<label for="name">Name</label>
<input
  type="text"
  class="form-control"
  id="name"
  required
  maxlength="30"
  minlength="5"
  ngModel
  name="name"
  #name="ngModel"
/>
<div *ngIf="name.touched && name.invalid" class="alert alert-danger">
<div *ngIf="name.hasError('required')">Name is required</div>
<div *ngIf="name.hasError('minlength')">
Name must be at least 5 characters long
</div>
<div *ngIf="name.hasError('maxlength')">
Name cannot be more than 30 characters long
</div>
</div>
<label for="email">Enter your e-mail id : </label>
<input type="email" class="form-control" id="email" name="email" required ngModel />
</div>
<button type="submit" class="btn btn-success">Submit</button>
</form>
</div>
The custom validator in Template-driven forms
There are use cases that the built-in validators can’t always help us validate. Then we must develop a unique validator function. The code listed below can be used to define a validator function that implements the ValidatorFn interface.
1 | interface ValidatorFn { |
The ValidationErrors object must include at least one key-value pair:
1 | type ValidationErrors = { |
The key, which should be a string, is used to indicate the sort of validation issue, such as invalidEmail, required, minlength, etc. The value, which can be anything, is used to provide extra details about the validation problem.
For the aforementioned example, we want to create a unique validation function that checks to see if the email contains no spaces.
Anywhere in the function, we can add our custom validator. For examples:
1 | import { ValidationErrors, AbstractControl } from '@angular/forms'; |
Reactive forms
In reactive forms, we explicitly create FormControl objects in that template’s component. The method will be the same for creating reactive forms. Thus, we will only see the code. Here, within the component of that template, we will specifically build a FormControl object. The HTML form without the ngModel directive is shown below.
1 | <div class="form-group"> |
For each field in the component, FormGroup and FormControls will be specifically created.
1 | form = new FormGroup({ |
More information on FormGroup can be found in the Angular docs.
We will now link these FormControl objects to the HTML form’s fields.
1 | <form [formGroup]="registrationForm"> |
You must include ReactiveFormsModule in your main module, app.module.ts, to use reactive forms.

Validation in reactive forms
Reactive forms don’t employ HTML5 validation attributes or the ngModel directive. When creating the FormControl objects in the component, you must specify the validators. For the FormControl class, you can use the following syntax:
1 | class FormControl extends AbstractControl { |
You must send it to the relevant ValidatorFn if you want to add FormControl’s built-in validator methods. The built-in validators required, minLength, and maxlength ere applied to the example below.
1 | registrationForm = new FormGroup({ |
The component would require the import of Validators.
As you may have seen, we do not employ the validation properties as Template-driven forms do. We employ the appropriate ValidatorFn, such as Validators.minLength(5), Validators.required, etc.
Now, we can return to the template and provide the validation messages:
1 | <form [formGroup]="userRegistrationForm"> |
Custom validator for reactive forms
You can easily develop your validator function, as we did for the template-driven form. The same unique validator function is being used in this instance.
1 | registrationForm = new FormGroup({ |
Conclusion
The most popular language for developing dynamic applications is Angular. Even you can construct forms that have appropriate validation. The user can complete all the fields while security is maintained. In this article, we looked at Template-Driven and Reactive forms, two different approaches to handling user inputs. We completed the process of adding validation to both kinds of forms. Finally, in addition to the built-in validators, we also created our validator function and included it.
The next steps
As we can see, Angular has excellent form support and some hidden features that are useful for form validation. Learn more about Angular and about 2FA, time-based one-time passwords, and how to request OTP verification using Angular. Discover how to use Angular Guard, AuthService, AuthGuard Implementation, and Routing Module Implementation and how to serve your Angular application via HTTPS locally.


Comments